Bathrooms

Why Sconces Belong in Any Home’s Lighting Plan by Margaret Chambers

Lantern style sconces are usually used outdoors, but can be used indoors as well, like in this Dallas bathroom.

Sconces are a wonderful way to add decorative lighting to any room. You most often see them on either side of a bathroom mirror, but I like to use them in many other applications as well, such as alongside a big painting, next to bookshelves in a library, or above fireplace mantles. If you’re currently designing a new home and want to try incorporating more sconces into your plan, you’ll find the following pointers useful.

Researching Sconce Styles and Materials

If you have a modern or contemporary home, you’ll want to look for wall sconces with straight lines, simple forms, and sharp angles. For a very traditional home, I’d recommend fine reproductions of traditional sconces, or shopping for antique sconces and having them rewired.

While sconces do not have to perfectly match the other light fixtures in the room, they should be complementary in some way, like sharing the same metal or similar shapes. At my interior design firm, we used to use a lot of iron sconces, but nowadays we prefer sconces made of brass or polished nickel, some with patterned fabric shades.

Ordering and Hanging Your Sconces

Adding sconces to an existing wall is a difficult process, so the planning for sconces is typically done during the design phase for a house. When we work with the client, we use a tape measurer to figure out where sconces should go so that we’ll know where the electrician should pull the cords to.

These modern sconces are an appealing contrast to the multicultural antiques and patterns in this formal living room.

Whenever possible, buy the sconces you think you want and hold them in the room to make sure they’re the right size. Getting the right proportion is tricky for most clients. Generally, the lower your ceilings, the smaller your sconces should be. Most sconces should be hung at approximately eye level, between five and a half to six feet high.

Hallways and Stairways:

Space the sconces about eight to ten feet apart to make sure that the hallway is adequately lit without being too bright. In a narrow hallway, sconces should not stick out too far.

One of the trickiest places to add sconces in is a staircase, but they can be helpful for safety purposes. Here, it’s usually better to use odd numbers of sconces rather than even.

Bedrooms:

Wall-mounted sconces are perfect for creating reading light over the bed. They should usually be positioned thirty to thirty-six inches above the top of the mattress, and no more than a foot away from the edge of the bed. Another great spot for a bedroom sconce is where the fabric is gathered on a canopy bed.

You can also use sconces to light the area where you get ready for the day. After all, overhead lights are not the best for putting on makeup or shaving.

Bathrooms:

Sconces for a bathroom mirror should be hung one quarter to one third of the way down from the top of the mirror. If your bathroom has two vanities, you’ll want three sconces: one to put on either side of the outer edges of the vanities, and one in between them.

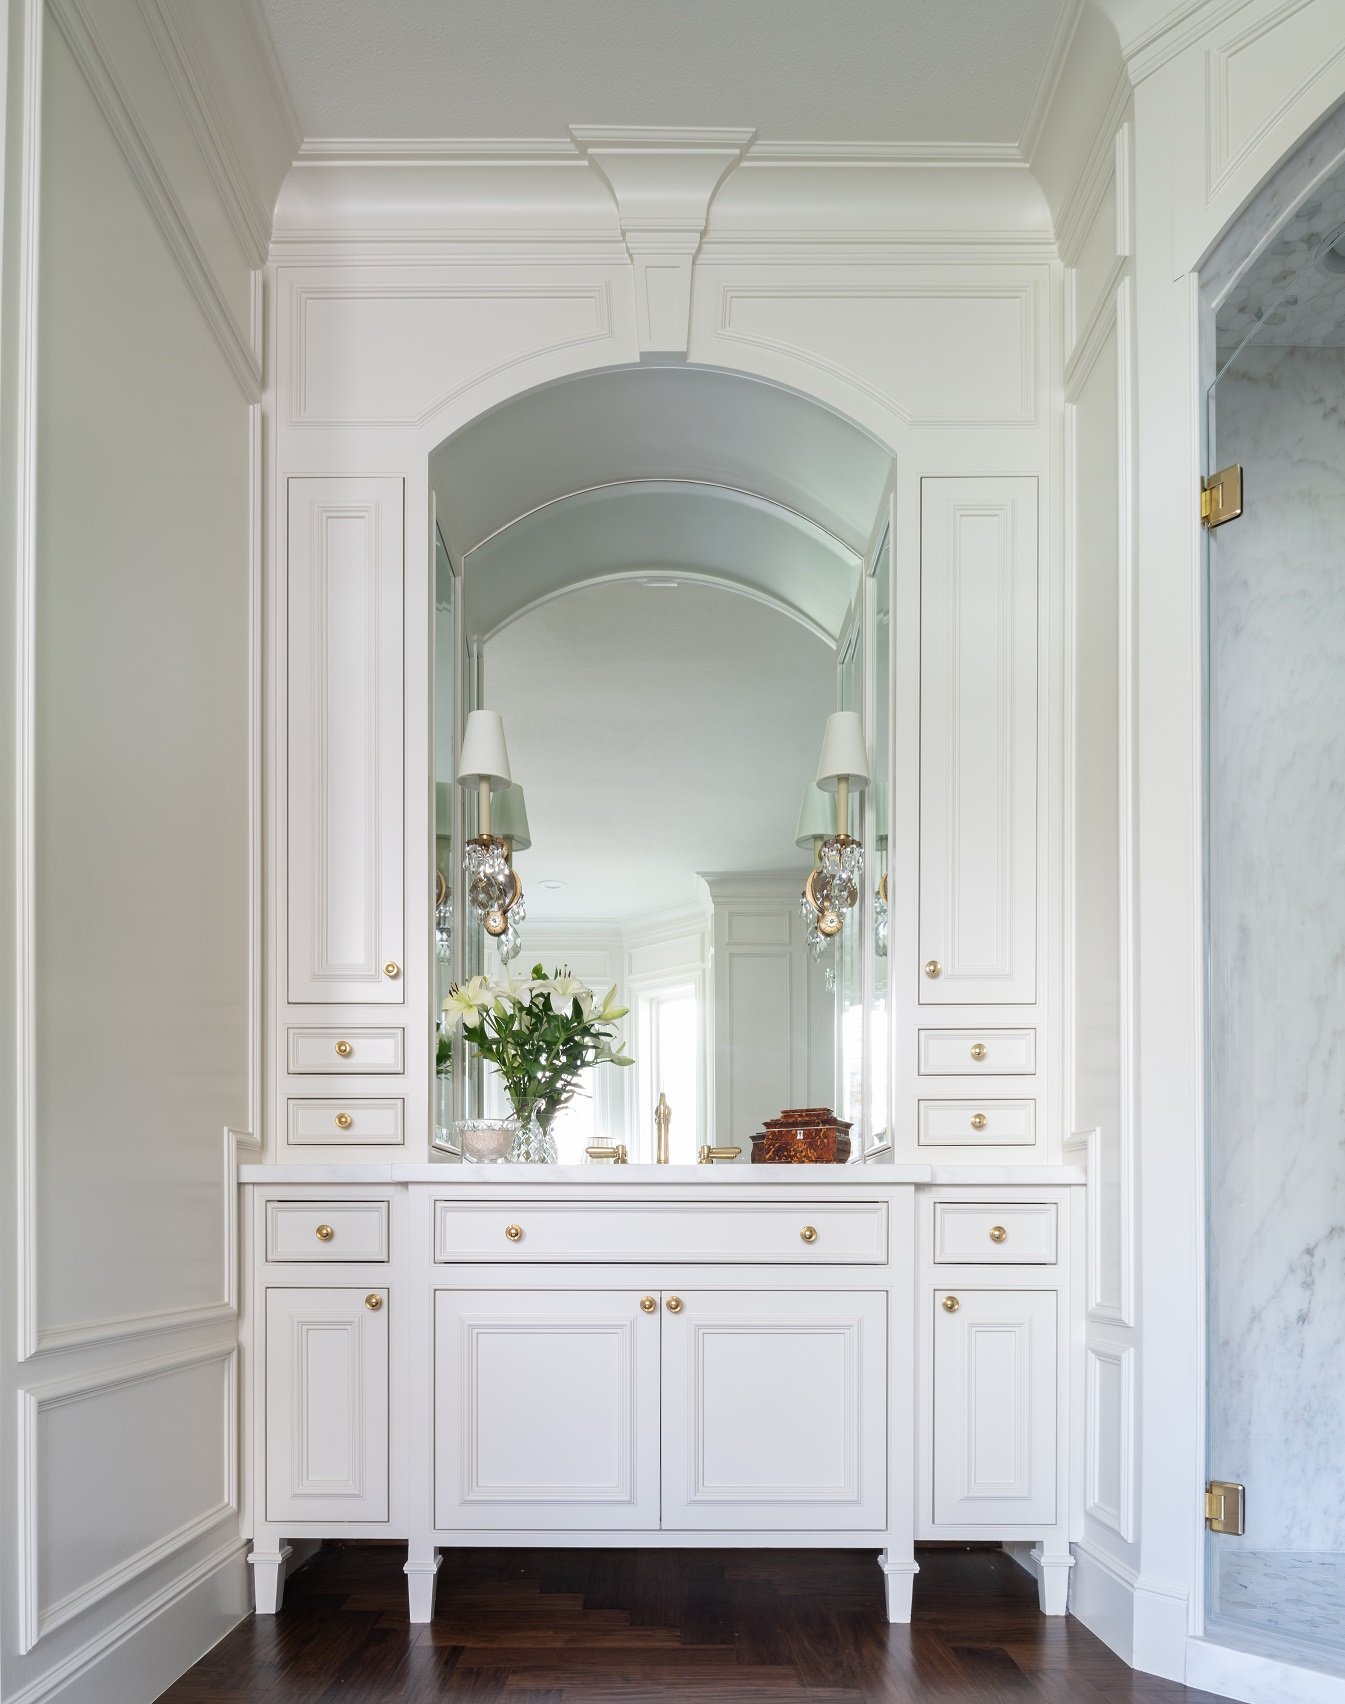
It's best to put sconces on either side of a mirror. Overhead lighting casts unflattering shadows on the face.

Exterior Lighting:

Outdoor lanterns are essentially sconces with covers to keep dirt out. In my opinion, people often position them too high or too low on the front of a house. Outdoor sconces need to be durable enough to withstand the elements and also bright enough to illuminate the porch, the front, or the back of your home.

Even after doing research and making careful measurements, some homeowners may still find it difficult to get sconces that are the right proportion and style for their home. In cases like this, they may want to seek out an interior designer such as myself who often uses sconces in their designs. The trouble is worth it: when sconces are thoughtfully chosen and positioned, they are a fantastic asset to your overall lighting plan. If you live in the Dallas-Fort Worth area and would like to schedule a free consultation with us, call 214-651-7665 or send an email to info@chambersinteriors.com.

RELATED ARTICLES:

Hardware 101: Choosing Styles, Shapes, and Finishes by Margaret Chambers

Always a classic choice for traditional architecture, brass hardware is trendy right now. For this Colleyville remodel, we used brass hardware to bring it up-to-date.

Hardware is often described as the “jewelry of the home,” but it’s more than just an accessory to your interior design. Hardware is something that you’ll be looking at and putting your hands on every day, so it needs to be both stylish and comfortable to use.

However, finding the right hardware isn’t always easy. There are many different shapes, styles, and finishes to choose from, and not all of them will look flattering in your home. Here are some things I as a designer consider when I’m helping a client choose their hardware for a new house or remodel.

Brass hardware and white-painted cabinetry are an appealing combination.

1. Make a List of Everything You Need

To begin, go through and count how many new handles, knobs, pulls, hinges, and faucets you will need in total. Determine your budget and how large you want the new hardware to be. Don’t forget to stop and think about how you want the hardware to feel, too. Whenever possible, try out samples at the hardware store so you can see how they fit your hand. It doesn’t matter how beautiful the hardware is if it’s cumbersome to use.

2. Learn About the Different Kinds of Hardware Available

If you’re updating your interior door handles, your two main choices are levers and knobs. Levers are usually used in contemporary homes, while knobs are great in traditional and transitional style homes. Keep in mind that knobs are more difficult to handle for those with mobility issues, the elderly, and young children. Knobs, unlike levers, can be easily child-proofed.

You should also make a note of which doors will need locks. Passage knobs are for doors that don’t need to be locked. Privacy knobs lock on one side, while keyed entry knobs lock from both sides. Dummy knobs don’t have any moving parts, meaning they don’t turn and click. They’re usually used for closet doors and pantries.

We chose hardware with a satin brass finish (seen here) for this Dallas remodel, as well as a satin nickel finish for the faucets in the main kitchen. This project was designed in collaboration with Helene's Luxury Kitchens.

Photo courtesy of First Showing Photography

As far as style goes, traditional homes usually look best with hardware that has rounded curves and intricate details instead of sharp angles. Meanwhile, simple, angular hardware is suited for contemporary interior design. These days, I see modern kitchens using very long drawer handles. Pot fillers have been a fad the last five years, but I try to steer my clients away from them. They distract from the cooktop and backsplash, so I think they’re a fad that won’t last.

3. Pick Up to Four Finishes to Use Throughout the Home

Believe it or not, it’s perfectly acceptable to mix finishes. The ideal range is three to four finishes in a home, with no more than two different finishes per room. If your heart is set on a door handle finish that looks good in one room but not the next, look into getting a “split finish,” in which the handle has a different finish on either side.

Your hardware finish choices should reflect your home’s style of architecture. For example, I would use oil-rubbed bronze in an Italian home, brass in a French, English, or Federal home, and either satin nickel or chrome in a contemporary home. Brass, by the way, is having a huge comeback. Another trendy finish that designers have been using the last few years is matte black.

To choose a complementary finish for your doors and cabinets, focus on color temperature. If your doors are painted a warm white, you should choose doorknobs with a warm finish, such as brass, polished nickel, or oil-rubbed bronze. If your doors are painted a cool color, like cool gray, I recommend hardware with a cool finish, like chrome. Remember that your hardware should also complement your light fixtures, especially your sconces.

This kitchen is an example of how to combine mixed metals effectively. The hardware is polished nickel, the pendant chandeliers are brass, and the vent hood is made of steel and brass.

Since hardware is situated at the front and center of all your doors and cabinetry, when in doubt, pick a style that is simple and timeless. If this is your first time choosing your own hardware, you may want to reach out to a designer like myself. With almost every job, I have to select and place the hardware, so I have a lot of experience mixing different styles and finishes in a single home. If you're interested in working with me and my design firm, call our Dallas office at 214-232-9501 or send an email to info@chambersinteriors.com.

RELATED ARTICLES:

A Designer’s Guide to Selecting the Best Tiles for Your Bathroom by Margaret Chambers

Patterned tiles, like the ones we used in this Preston Hollow pool bathroom, can add a lot of impact to a small space.

One of the reasons choosing tiles for your bathroom can be so tricky is that there are a lot of options, but not all of them will still look current in a few years. And, unfortunately, swapping out tile is not an easy project. The key is to find the right balance between a tile that is timeless but also has some character to it. The most important factors to consider are: the size of your bathroom, your preferred colors, and what pattern you want the tiles to be installed in.

Tile Sizes:

Different parts of your bathroom call for different sizes of tiles. For example, if you have a shower bench, a larger slab will feel more comfortable to sit on than a lot of smaller tiles. At my design firm, we usually use matching slabs of the same material for both the shower seat and the sink countertop.

This shower we remodeled in a Colleyville home has small mosaic tiles on the floor for safety and security.

Mosaic tile has more grout lines, which makes it suitable for shower floors: more grout lines equal better drainage and more traction. Ideally, the tiles should be two inches or smaller. Mosaic tiles are not the only choice for shower floors, however. Slip-resistant ceramic is another safe option.

Tile Colors:

The most popular tile for bathrooms is white subway tile. I recommend choosing a bright white tile if your toilet, bathtub, and sink are also bright white. Sometimes, a warmer white (such as a biscuit color) is preferable, especially in traditional houses.

I personally consider bold accent tiles to be dated. I haven’t used them in my projects for a decade. Instead of having a border of accent tiles in your bathroom, I suggest combining a neutral tile (like white or gray) with an interesting wallpaper or paint color.

These floor tiles are cut in a fresh new version of a traditional pattern. The biscuit white color matches the tub.

Remember the rule of three: a patterned tile should contain no more than three colors, and you should stick to no more than three varieties of tile in the entire bathroom. A good starting point is to pick out a tile you really love and then pick two other tile types that complement it.

Something to note about dark grout is that it shows efflorescence (light grey spots from salts) over time. White grout will show dirt more easily, so make sure to use grout sealer and thin grout lines if you choose white for your grout color.

Tile Materials:

Ceramic is the most affordable tile, so it’s a good choice for covering large areas such as your floor. Porcelain is more expensive, but many people prefer it for the following reasons: it’s more durable, and the color goes all the way through the tile instead of being merely glazed on top. That way, if a porcelain tile is chipped, the color that shows underneath is the same.

Glass tile is great for an accent wall, but it’s also slippery, so don’t use it on the floor. If you’re interested in glass tile, try shopping for it in person instead of online. Seeing it in person helps you get a better sense of its color and shine.

Tile Placement and Patterns:

Tile should be used on every side of the shower except for the door or curtain. I like to encourage my clients to also cover the shower ceiling with tile instead of paint, since paint can peel in humidity.

A common piece of advice is to install floor tiles diagonally to makes a small bathroom feel more expansive. Just keep in mind that attention-grabbing patterns like diagonal and herringbone should only be used with simple tile patterns that have subtle grout lines. The most conservative patterns for tile are “running bond” (which looks like an alternating brick pattern) and “stacked,” in which rows of tiles are stacked vertically from top to bottom.

This floor has small hexagon-shaped tiles that run into the shower, while the shower walls have herringbone tiles.

The right tile choices can make or break a bathroom, so it’s worth your time to research and proceed with caution. After all, it’s a costly mistake to pick the wrong tile. If you’re hesitating between several different options, then it might be time to consult a professional designer. An experienced designer like myself will be able to point you towards options that are both practical and pleasing to the eye. To schedule a free consultation with us, send an email to info@chambersinteriors.com or call our Dallas office at 214-232-9501.

RELATED ARTICLES: