This project has an open concept space where the dining room, kitchen, morning room, and living room are all connected.
There’s a reason why open floor plans have become so ubiquitous in Dallas homes over the last few decades. Open concept interior design promotes a feeling of togetherness, which is especially attractive to young families with busy schedules.
However, people who are furnishing an open concept home for the first time may be intimidated by all the extra room. How do you make sure that your home feels warm and inviting instead of empty and cold? How do you balance the lighting and ensure that you’re getting the most use out of the space? For answers to these questions and more, read on.
Step 1: Choosing Flooring and Paint Colors
If you’re building a new home or having one remodeled, you should try to use the same flooring material throughout your open concept space. For paint colors, we as designers suggest choosing a neutral color for the walls. Some open concept homes feature an accent wall painted in a different color. Even in this case, I would recommend painting the trim all in the same color (or even the same color as the walls) for a feeling of continuity in the room.
If you have a high ceiling, you might also consider painting the ceiling a darker shade, which helps the room feel cozy and cave-like. Regardless of what paint colors you choose, don’t leave your walls bare: make sure to fill all that open wall space with art and mirrors.

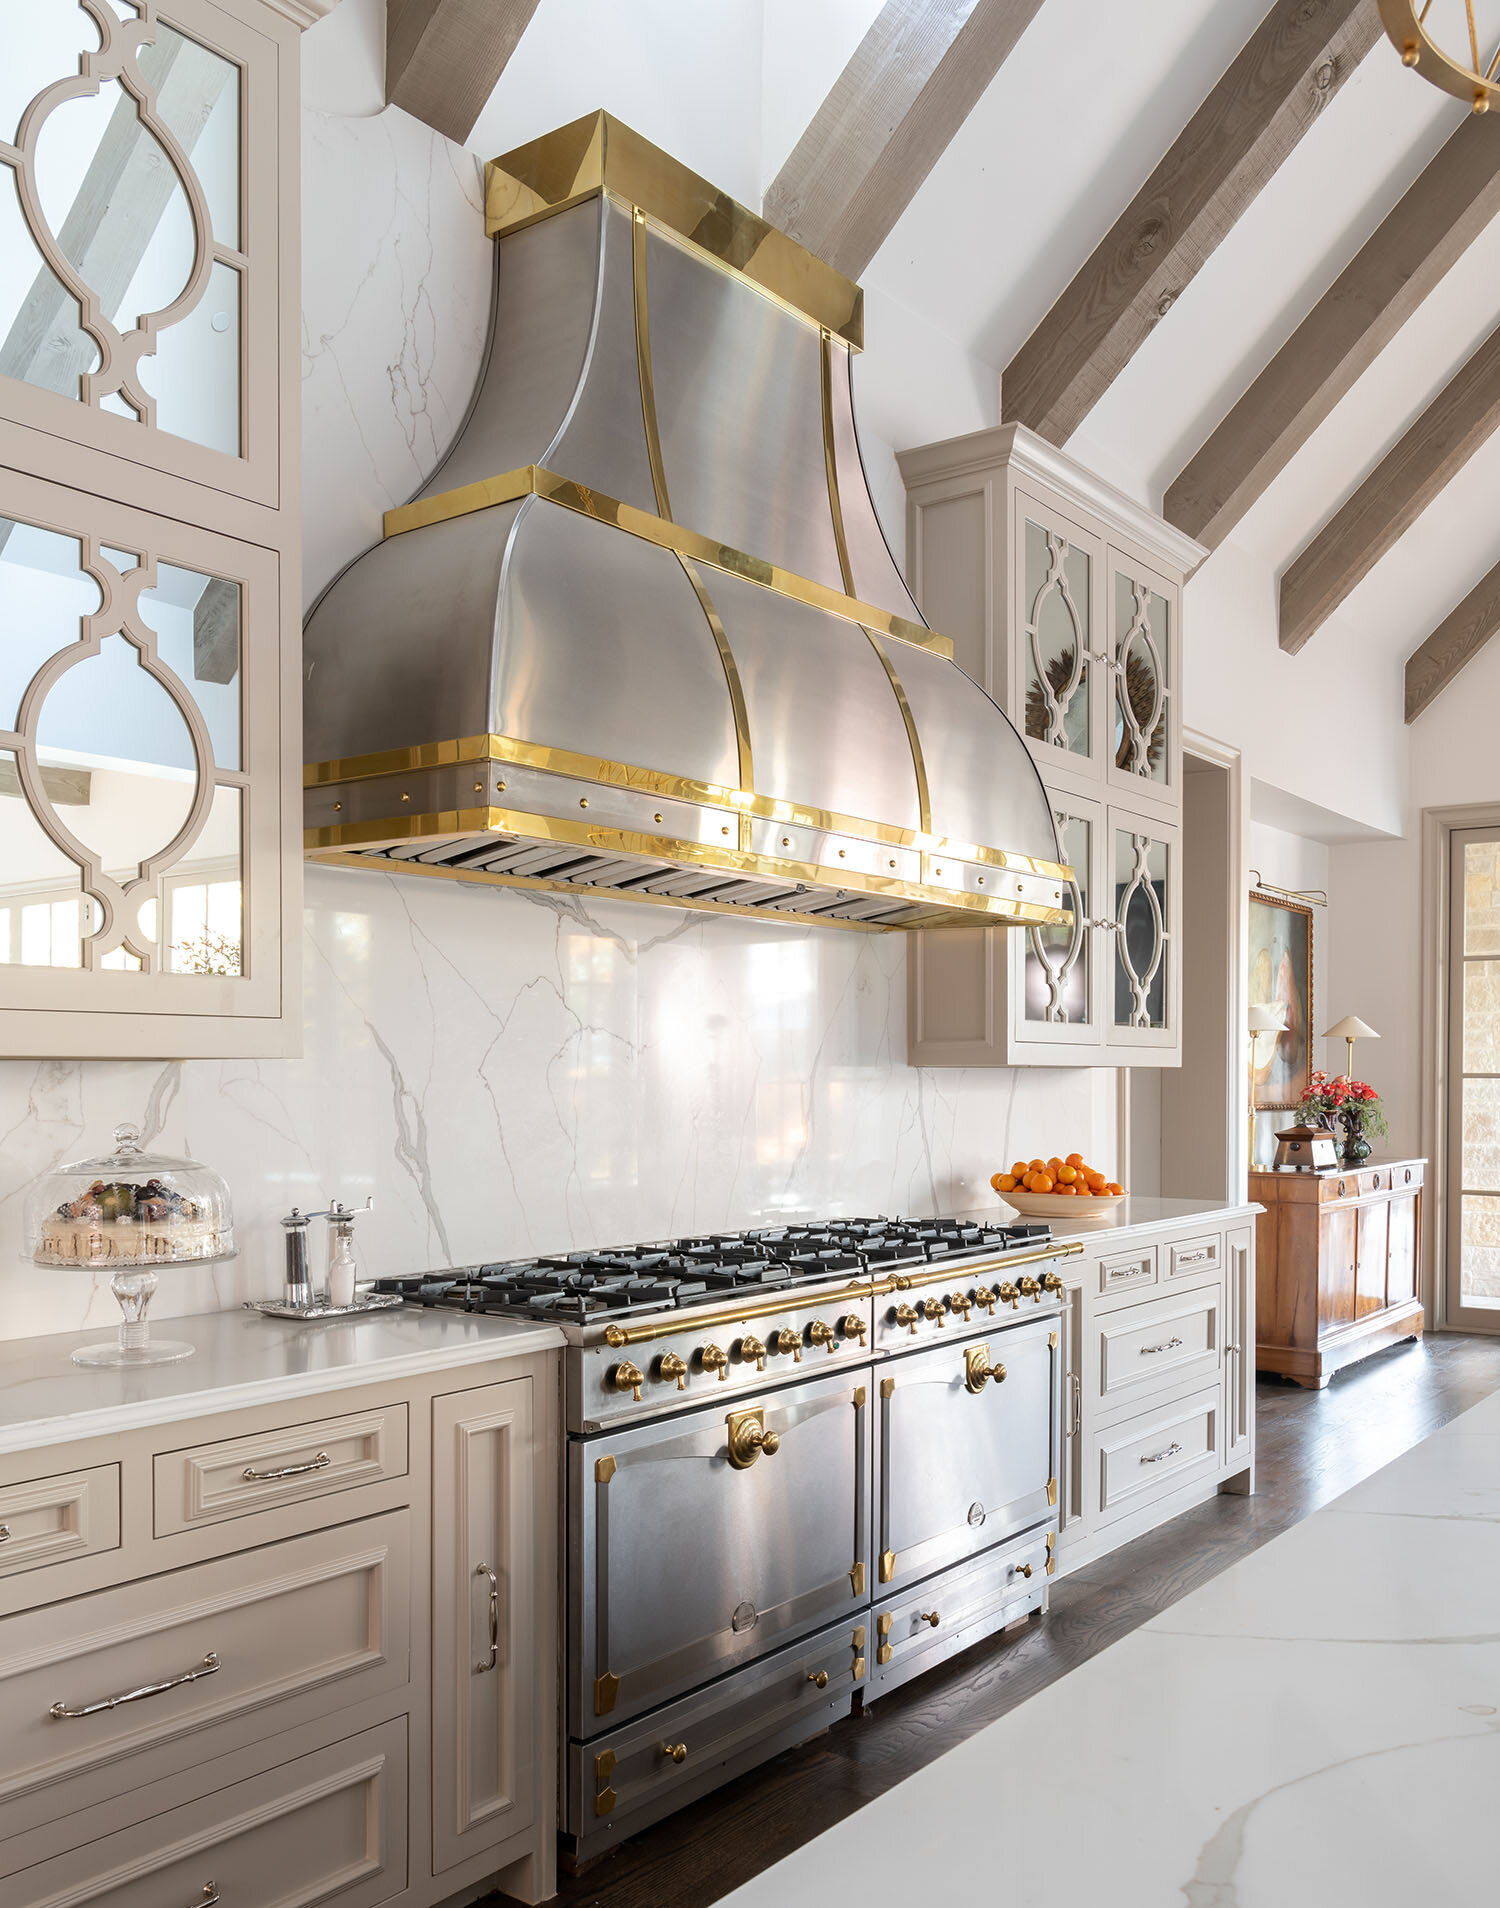
Large windows filter light into this open concept kitchen during the day, while chandeliers illuminate it at night.
Step 2: Plan Your Lighting Ahead of Time
It’s very important that your open concept space be well-lit at all times of the day. An open floor plan that is shadowy in spots feels unbalanced and unwelcoming. The easiest way to create an even coverage is by installing overhead lights and scattering lamps across the space. When I design an open concept space, I make sure to plan the positions of the furniture and floor outlets ahead of time. That way, we can plug the lamps in the floor outlets without running the cords across the floor.
Step 3: Furniture Shopping
If you have an especially large open floor, you’ll want to “anchor” it with appropriately sized furniture, such as a large dining table and large sofas. You can then pair your bulky pieces with slender furniture. Whenever you can, include multifunctional pieces. Putting a writing desk in your den area makes that space also function as a home office.

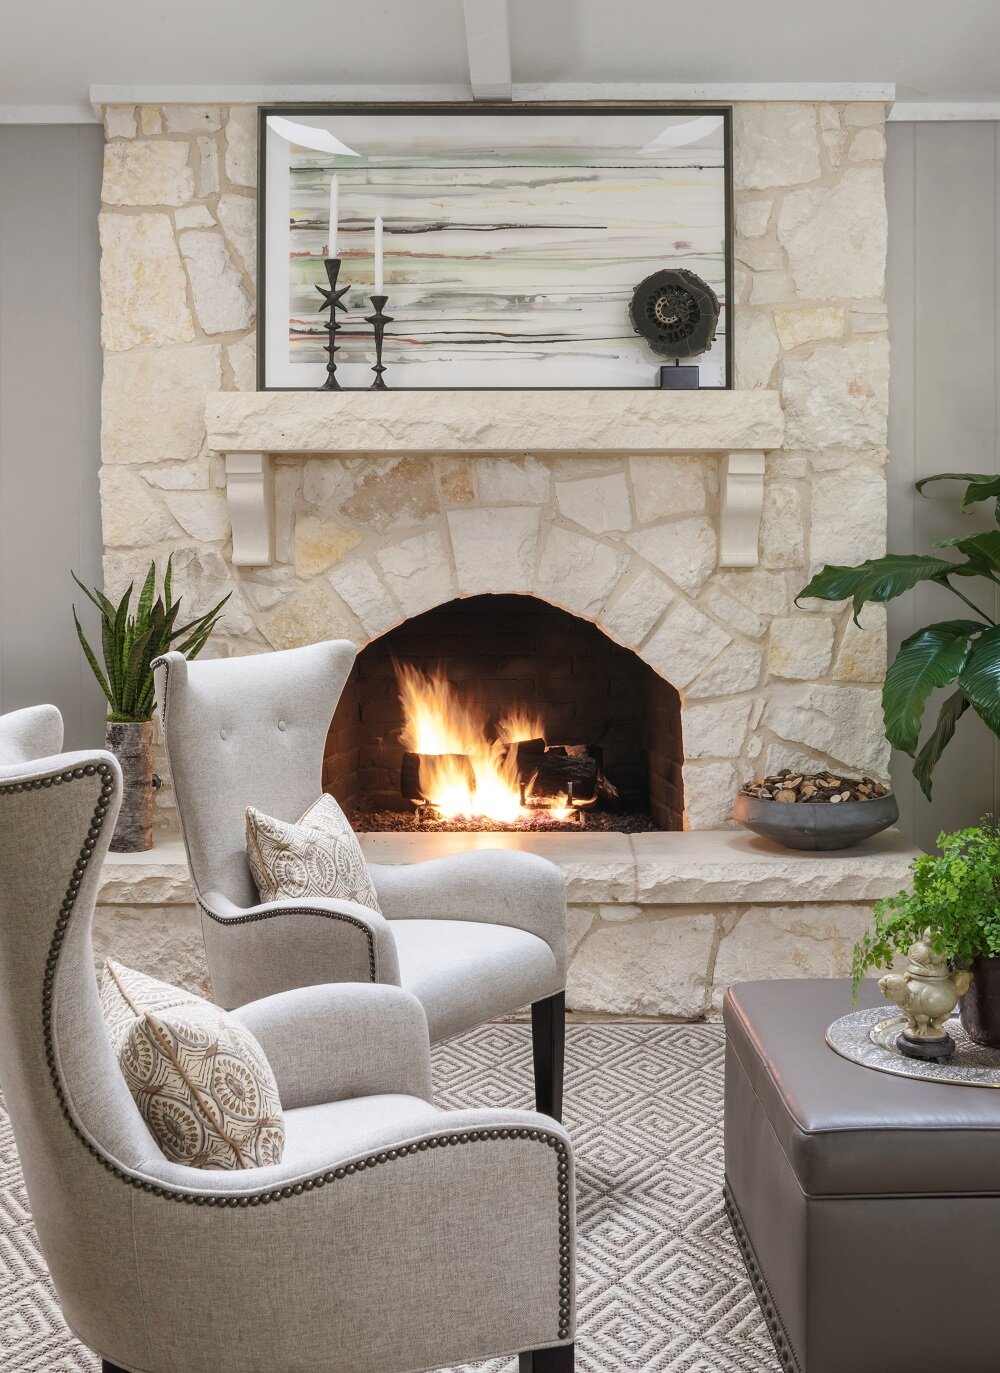
This Dallas living area features the same rust, beige, green, and cream colors that we used in the open concept kitchen.
It’s generally not advised to push your furniture up against the walls, so keep in mind that your furniture will be seen from all sides. Make sure to buy pieces that you think look great at any angle.
Step 4: Use Furniture and Rugs to Divide the Space
Once you have your color scheme, furnishings, and lighting fixtures ready to go, the next step is to use them to divide the floor into functional spaces. A good place to start is by identifying a focal point in your room and then organizing a seating area around it. Examples of focal points in an open concept space include gallery walls, large windows, and fireplaces.

Seen here is an open concept morning room. The swivel chairs can be turned towards the fireplace or the kitchen.
Rugs are one of your best tools for visually breaking up a large space and marking off seating areas. By having the legs of your furniture touching a single area rug, it helps bring them together. You can also create separate areas in your space by using shelving units, decorative screens, sectionals, or console tables.
To prevent each of these areas from clashing too much, coordinate them by using similar colors and materials in each zone. It’s not necessary to use the same colors and patterns throughout your whole house, but in the open concept space, everything within eyesight needs to harmonize.
Learning how to decorate an open concept space is an important skill even if you’re not currently living in one. After all, most newly built homes these days have a floor that connects the family room and kitchen area, so it’s likely that your next home will be open concept.
By planning the space thoughtfully, or working with an interior designer who is experienced with open concept design, you can create a space that feels spacious but also comforting. If you're interested in working with Chambers Interiors for your upcoming project, call our Dallas office at 214-232-9501 or send an email to info@chambersinteriors.com.