Modern

Take Your Interiors to the Next Level with Decorative Mirrors by Margaret Chambers

Antique mirrors are best for traditional homes, like this English cottage we designed in University Park.

Mirrors are one of those interior design tools that no home can really do without. Even in rooms where you wouldn’t normally need a mirror, they still offer many benefits, such as reflecting more light into the space or making a room feel more expansive. If you’d like to add more mirrors to your home but aren’t sure what kind to buy or where to hang them, read on for some of my personal tips.

Choosing Mirror Size

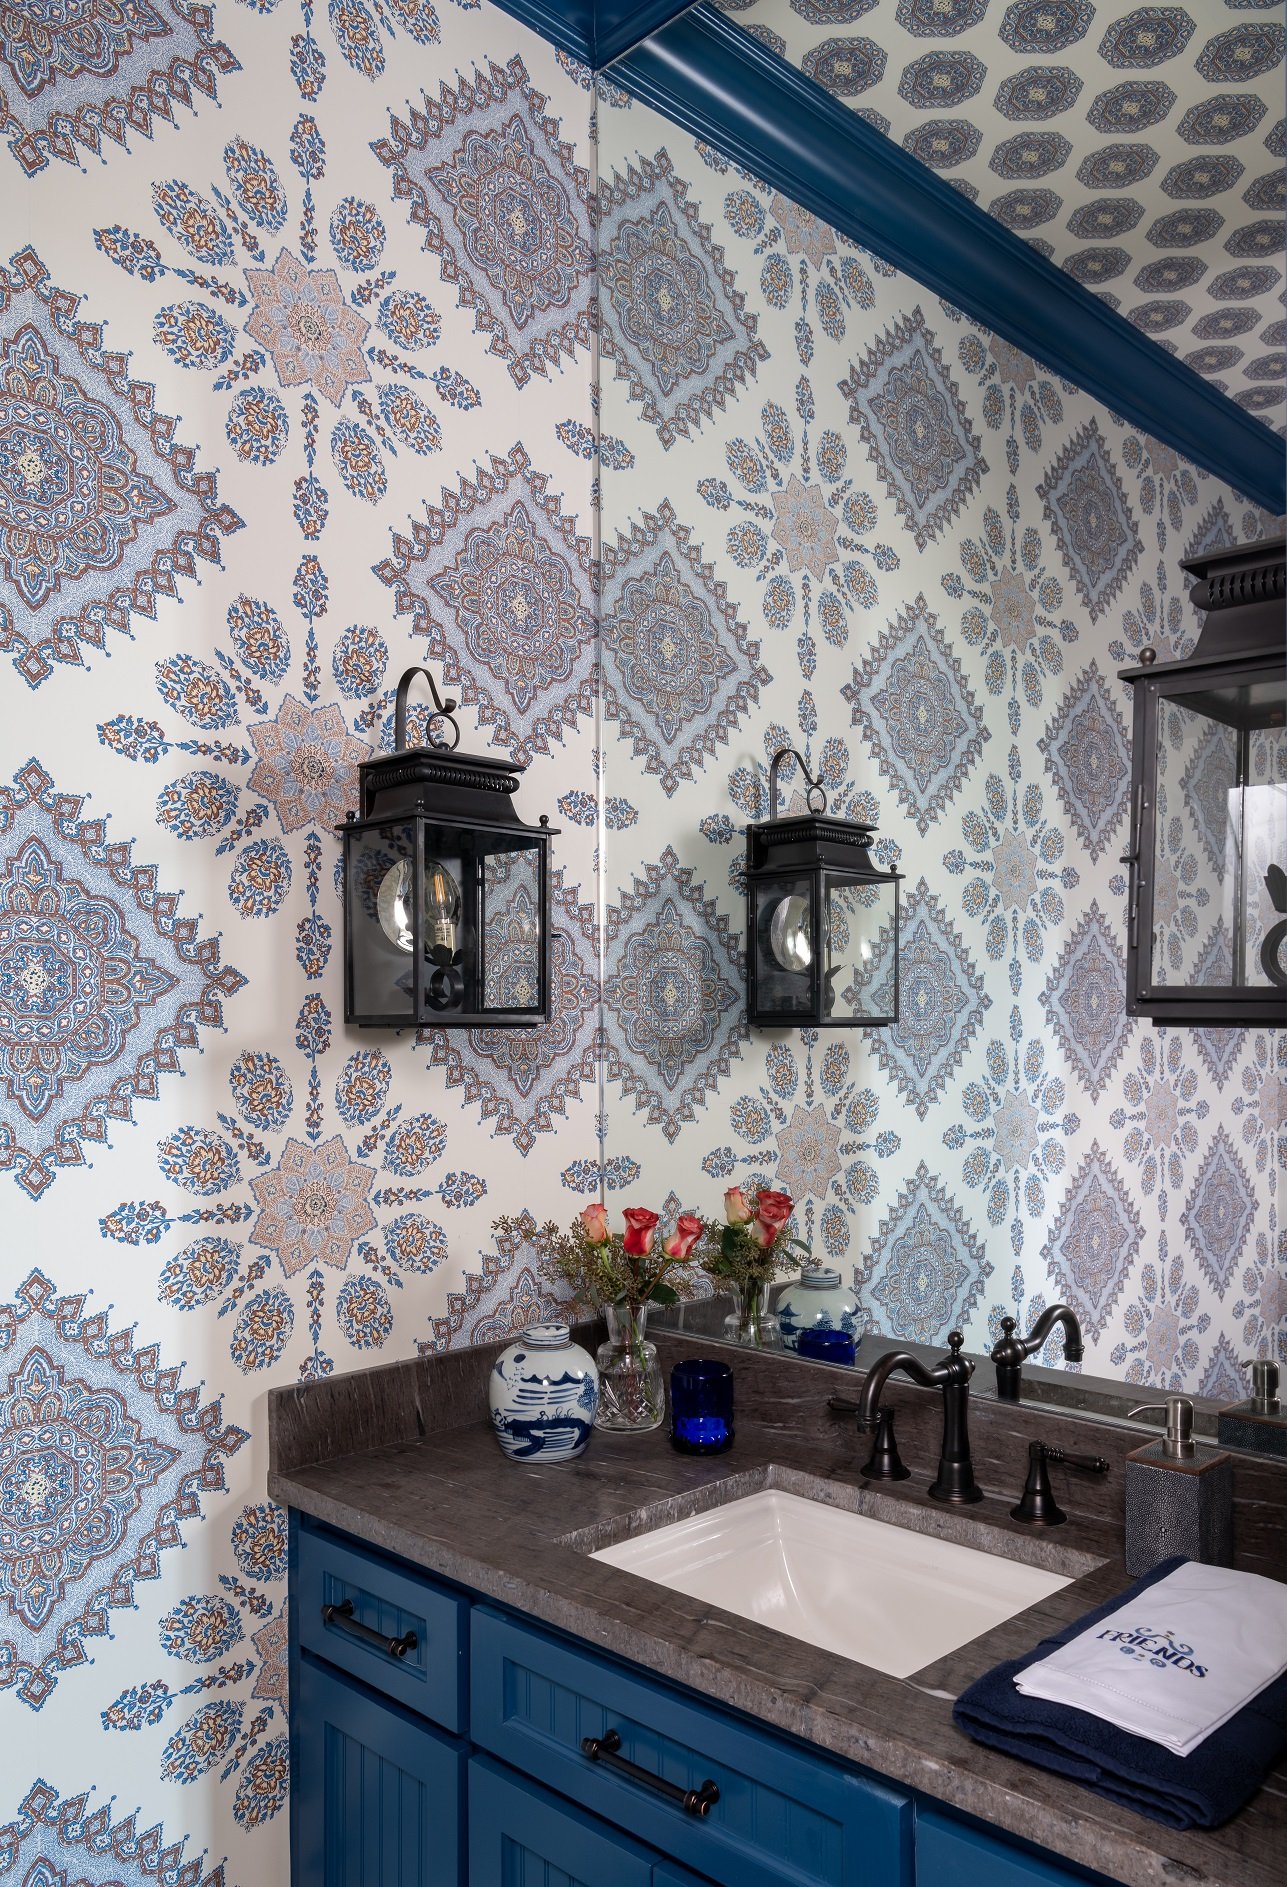
This mirror in a Dallas home goes all the way up to the ceiling. It makes the small powder room feel twice as large.

As far as size goes, you should usually go for the largest mirror you can afford. Because mirrors tend to recede into the background, you can get away with a large mirror even in a space where a large painting of the same size wouldn’t work. Don’t forget that mirrored walls are an option too — they really open up a small space, like a bathroom.

Selecting Mirror Shapes

In a room with a lot of straight lines, a round mirror will add some much-needed variety.

Mirrors come in a lot of shapes besides rectangular, so consider your options carefully before buying. It’s possible that a round, oval, bull’s-eye, square, or sunburst mirror would be the perfect shape for your wall. At my firm, we sometimes use beveled mirrors with small medallions in the corners.

Finding the Right Mirror Style and Frame

Carved frames like this one can be ‘too much’ for contemporary homes but are perfect for Old World style homes.

The style of your home or room should complement the mirrors you choose. Traditional mirrors, which often have sculpted frames with intricate details, are best for traditional houses, for example. If you have a brand-new mirror that you want to include in a traditional room, you can always have it antiqued. Mirror frames in contemporary or modern homes tend to be more simple and subtle.

Placing Your Mirrors

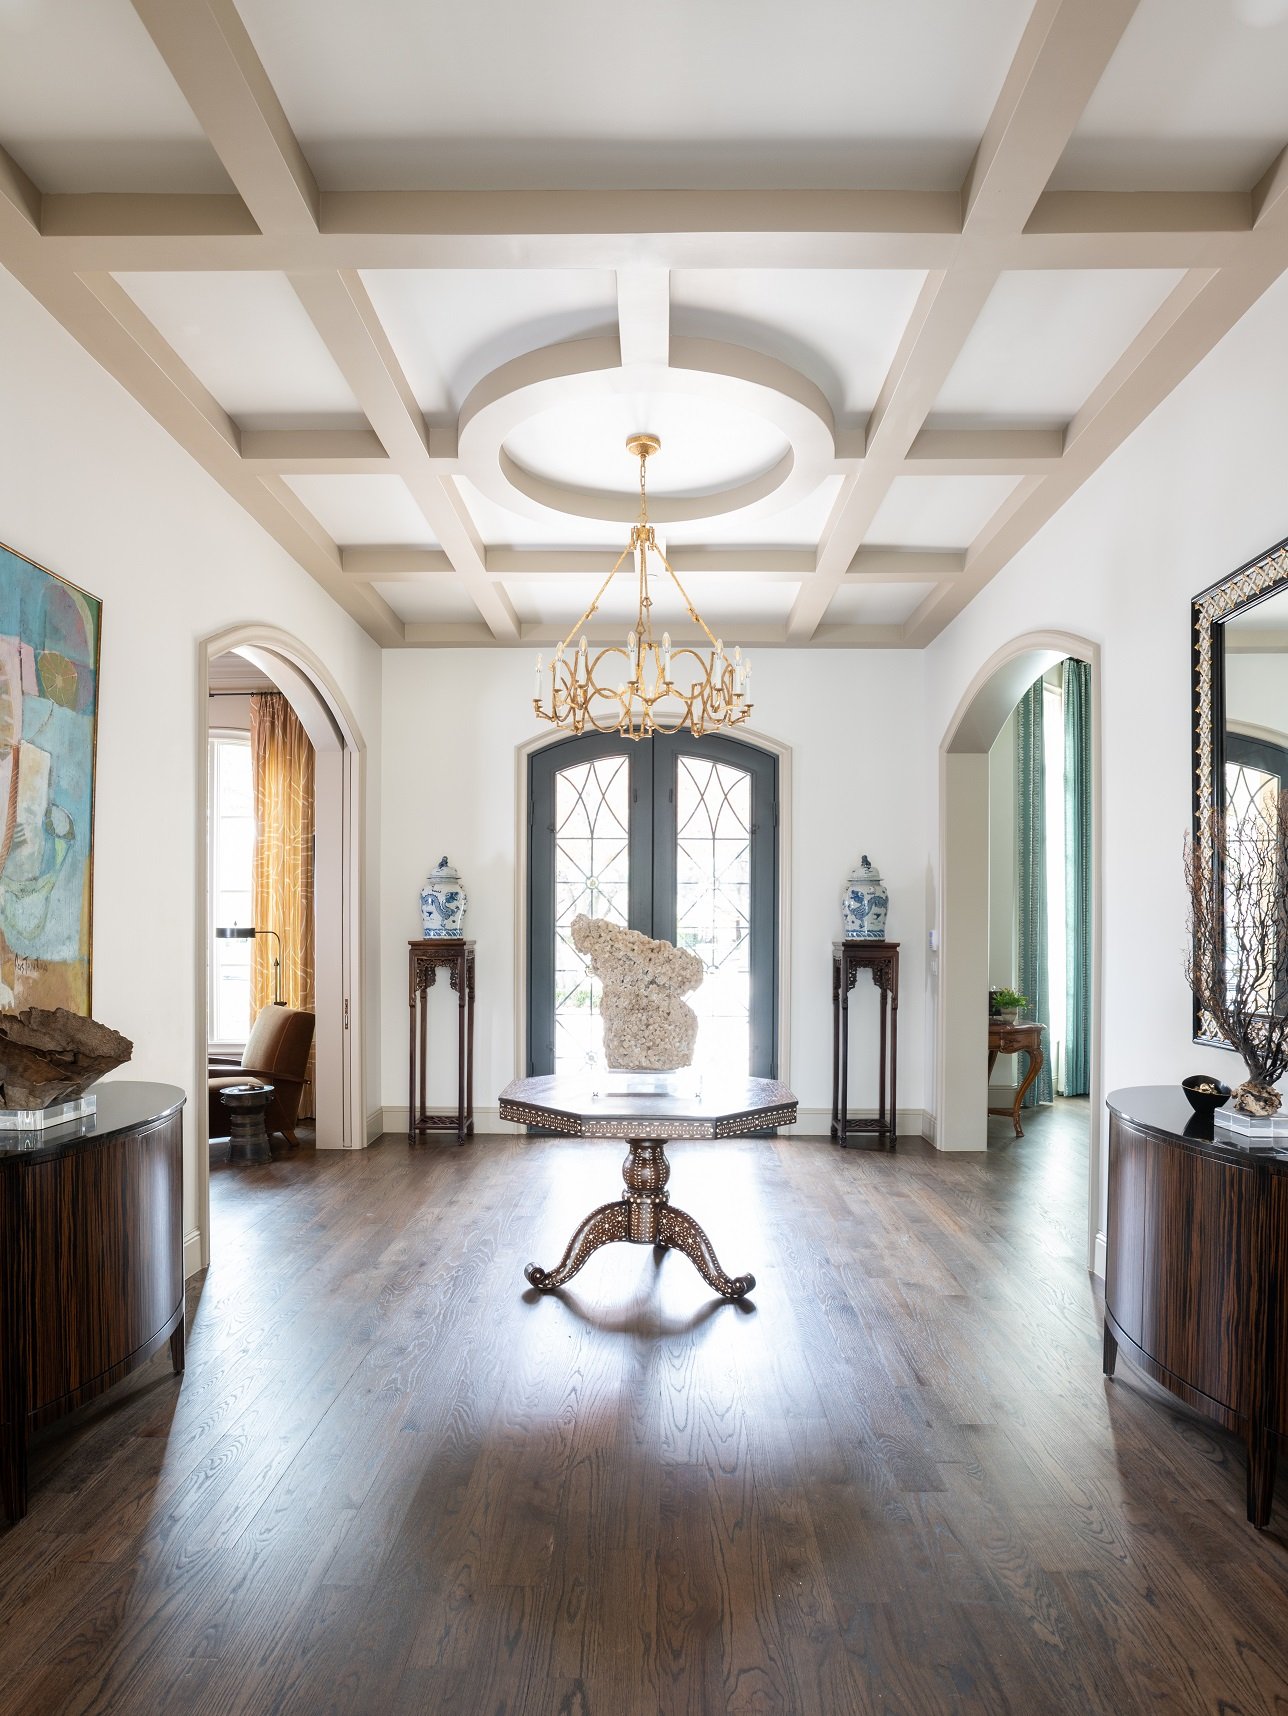
We placed a painting and a mirror across from each other in this entry so that the painting would reflect in the mirror.

When it comes to finding the right spot for your mirror, you have two options. You should either try to reflect natural light or reflect something decorative in your room. For windowless rooms, you can also put your mirror next to a lamp or sconce to double the amount of light: this is a great technique for lighting up dark corners.

If you’re going to reflect something besides light or scenery, it’s important that your mirror shows something attractive. For example, try to reflect a painting, a piece of pretty furniture, or a beautiful door in your mirror.

Hanging Your Mirror

If you're hanging a mirror above a chest, it should generally be closer to the chest rather than centered on the wall.

How high you hang your mirror depends on what kind of room it’s in. For example, a hallway mirror should be at eye level so that you can check your reflection before you leave the house. If you’re hanging your mirror above a piece of furniture, the mirror should be closer to the furniture than it is to the ceiling. This brings the mirror and furniture together as a vignette. A nice way to fill a large wall is to hang one mirror in the center of a group of small individual paintings or prints.

Mirrors need to be hung with at least two wall hooks or picture hangers. The problem with hanging a mirror on a single hook is that it will end up resting against the wall at an angle, which distorts the reflection. Always have your very heavy mirrors hung by professionals.

Once you’ve learned about the different kinds of mirrors available and how to utilize them effectively, adding that extra touch of luxe to your home will be that much easier. If you could use some help with sourcing antique mirrors or custom mirrors for your Dallas home, give us a call at 214-651-7665 or send an email to info@chambersinteriors.com. I work with a wide variety of interior design styles, so I have a lot of experience with using both traditional and contemporary mirrors.

RELATED ARTICLES:

Four Crucial Steps for Designing an Open Concept Space by Margaret Chambers

This project has an open concept space where the dining room, kitchen, morning room, and living room are all connected.

This project has an open concept space where the dining room, kitchen, morning room, and living room are all connected.

There’s a reason why open floor plans have become so ubiquitous in Dallas homes over the last few decades. Open concept interior design promotes a feeling of togetherness, which is especially attractive to young families with busy schedules.

However, people who are furnishing an open concept home for the first time may be intimidated by all the extra room. How do you make sure that your home feels warm and inviting instead of empty and cold? How do you balance the lighting and ensure that you’re getting the most use out of the space? For answers to these questions and more, read on.

Step 1: Choosing Flooring and Paint Colors

If you’re building a new home or having one remodeled, you should try to use the same flooring material throughout your open concept space. For paint colors, we as designers suggest choosing a neutral color for the walls. Some open concept homes feature an accent wall painted in a different color. Even in this case, I would recommend painting the trim all in the same color (or even the same color as the walls) for a feeling of continuity in the room.

If you have a high ceiling, you might also consider painting the ceiling a darker shade, which helps the room feel cozy and cave-like. Regardless of what paint colors you choose, don’t leave your walls bare: make sure to fill all that open wall space with art and mirrors.

Large windows filter light into this open concept kitchen during the day, while chandeliers illuminate it at night.

Large windows filter light into this open concept kitchen during the day, while chandeliers illuminate it at night.

Step 2: Plan Your Lighting Ahead of Time

It’s very important that your open concept space be well-lit at all times of the day. An open floor plan that is shadowy in spots feels unbalanced and unwelcoming. The easiest way to create an even coverage is by installing overhead lights and scattering lamps across the space. When I design an open concept space, I make sure to plan the positions of the furniture and floor outlets ahead of time. That way, we can plug the lamps in the floor outlets without running the cords across the floor.

Step 3: Furniture Shopping

If you have an especially large open floor, you’ll want to “anchor” it with appropriately sized furniture, such as a large dining table and large sofas. You can then pair your bulky pieces with slender furniture. Whenever you can, include multifunctional pieces. Putting a writing desk in your den area makes that space also function as a home office.

This Dallas living area features the same rust, beige, green, and cream colors that we used in the open concept kitchen.

This Dallas living area features the same rust, beige, green, and cream colors that we used in the open concept kitchen.

It’s generally not advised to push your furniture up against the walls, so keep in mind that your furniture will be seen from all sides. Make sure to buy pieces that you think look great at any angle.

Step 4: Use Furniture and Rugs to Divide the Space

Once you have your color scheme, furnishings, and lighting fixtures ready to go, the next step is to use them to divide the floor into functional spaces. A good place to start is by identifying a focal point in your room and then organizing a seating area around it. Examples of focal points in an open concept space include gallery walls, large windows, and fireplaces.

Seen here is an open concept morning room. The swivel chairs can be turned towards the fireplace or the kitchen.

Seen here is an open concept morning room. The swivel chairs can be turned towards the fireplace or the kitchen.

Rugs are one of your best tools for visually breaking up a large space and marking off seating areas. By having the legs of your furniture touching a single area rug, it helps bring them together. You can also create separate areas in your space by using shelving units, decorative screens, sectionals, or console tables.

To prevent each of these areas from clashing too much, coordinate them by using similar colors and materials in each zone. It’s not necessary to use the same colors and patterns throughout your whole house, but in the open concept space, everything within eyesight needs to harmonize.

Learning how to decorate an open concept space is an important skill even if you’re not currently living in one. After all, most newly built homes these days have a floor that connects the family room and kitchen area, so it’s likely that your next home will be open concept.

By planning the space thoughtfully, or working with an interior designer who is experienced with open concept design, you can create a space that feels spacious but also comforting. If you're interested in working with Chambers Interiors for your upcoming project, call our Dallas office at 214-232-9501 or send an email to info@chambersinteriors.com.

RELATED ARTICLES: